Mac 上的终端神器 - iTerm2
iTerm2 是Mac端默认终端的替代品,也是目前 macOS 下最好用的终端工具,集颜值和效率于一身。相比于自带的终端和 Windows 平台终端Terminals,iTerm2 的功能强大到难以想象。官网本身已有非常好的介绍,今天简单的介绍下iTerm2 一些有用的功能、插件和快捷键。
1. iTerm2安装
官网下载包安装:http://iterm2.com/
使用Homwbrew安装:
1 | brew install iterm2 |
2. iTerm2配置
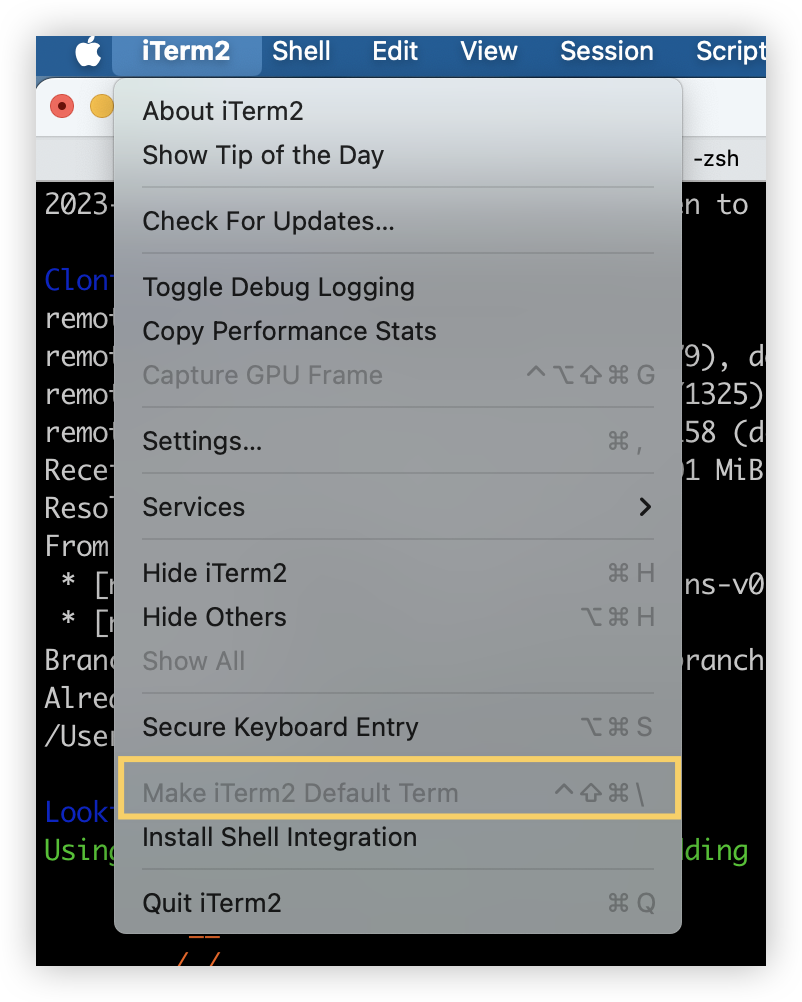
2.1. 设置iTerm2为默认终端
打开iTerm2,左上角选择iTerm2 - Make iTerm2 Default Term
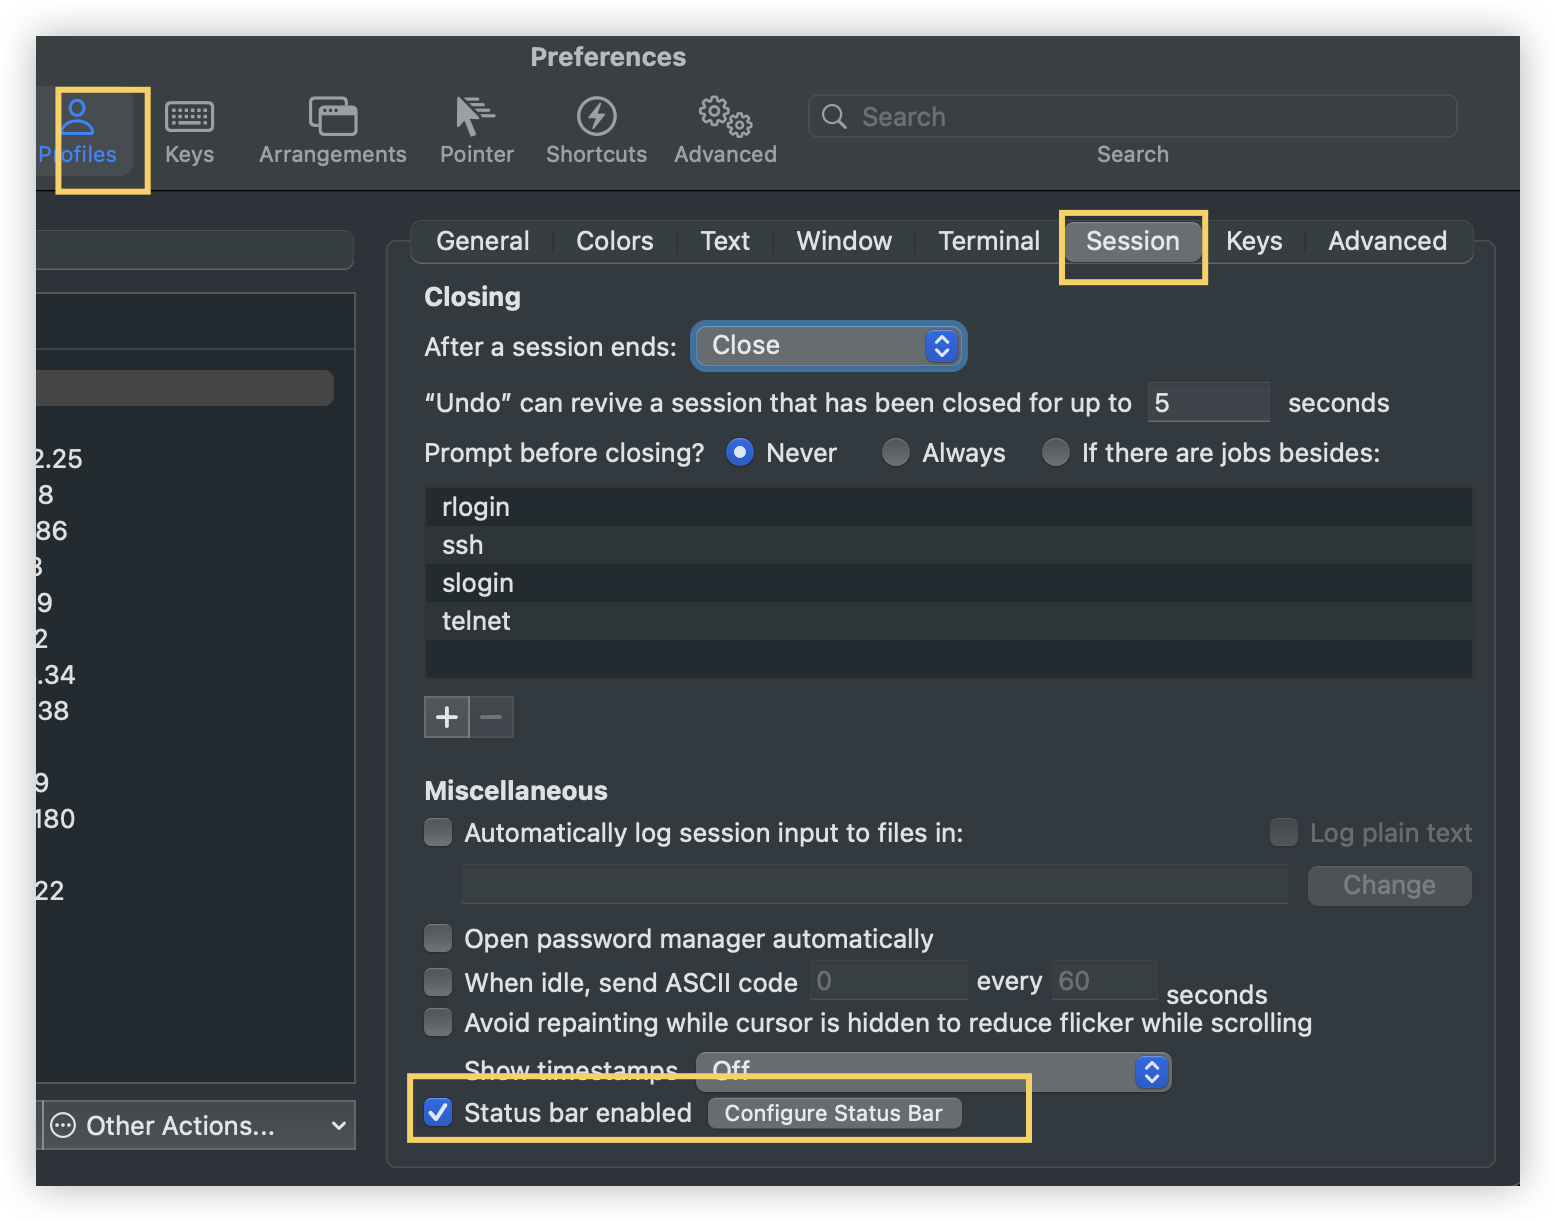
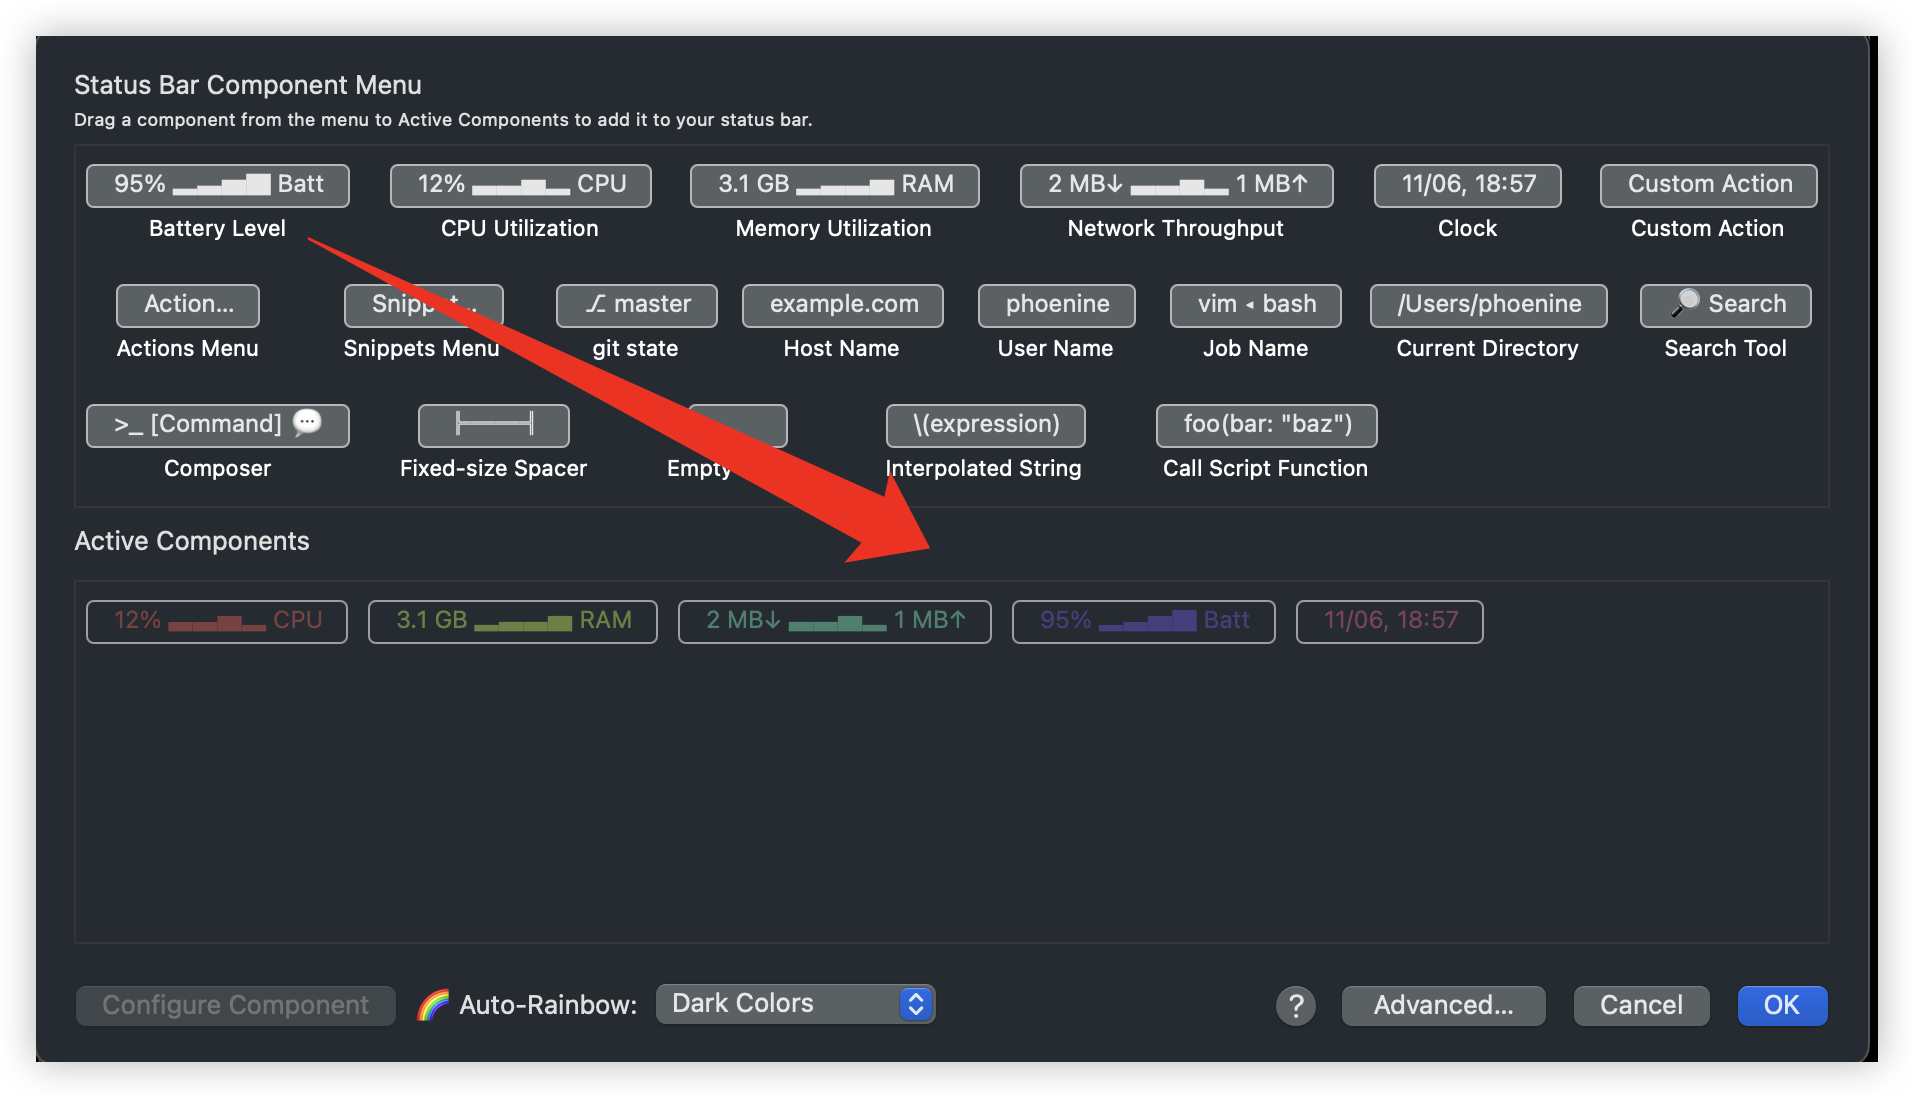
2.2. 设置 Status bar
iterm2 提供了很多 Status bar,可在在终端页面显示更多关于本机的信息,如:CPU、内存、电池电量等。点击 Configure Status bar 进入配置页面,这里将想要的 Status bar 拖入下面的方框即可。这里还推荐选择 Auto-Rainbow,这样 Status bar 就是以彩色的形式展示了。
2.3. 安装oh-my-zsh
在设置好 iterm2 之后,可以根据需要安装 oh-my-zsh。Oh My Zsh 是一款社区驱动的命令行工具,它基于 zsh 命令行,提供了主题配置,插件机制,大大提高了可玩性及使用效率。官网提供了两种安装方式,注意要科学上网:
1 | Install oh-my-zsh via curl |
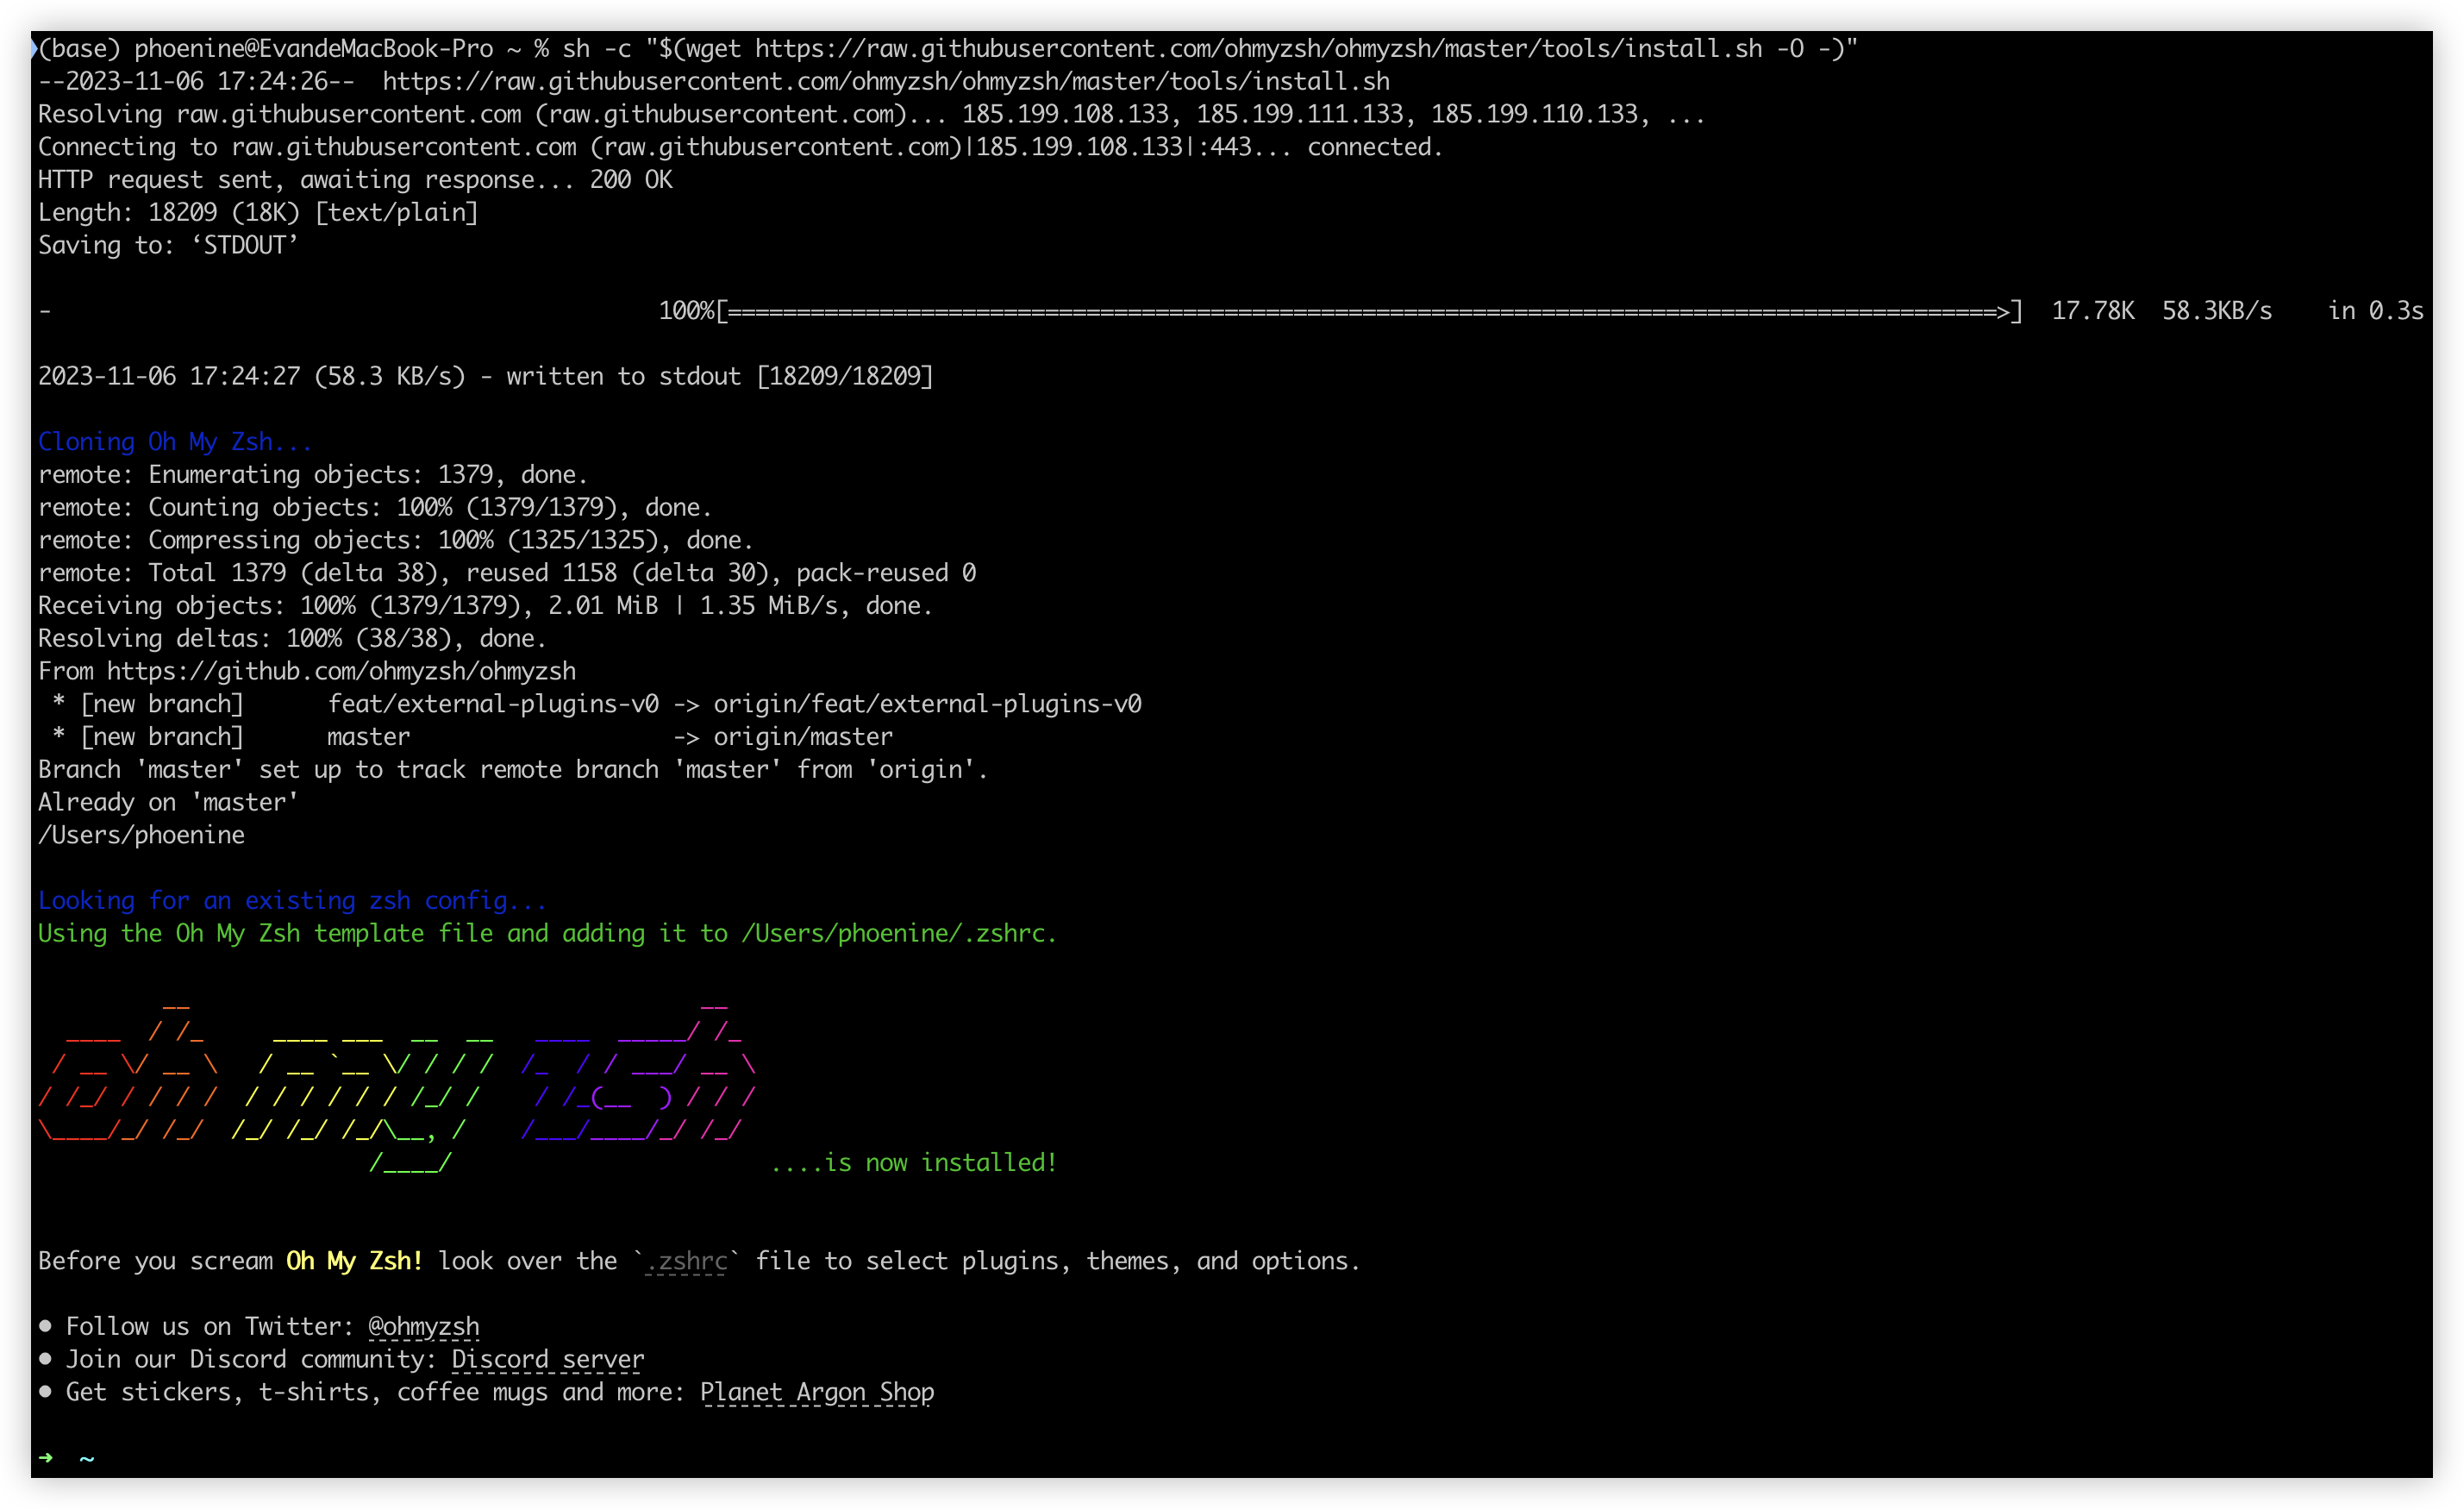
安装完成后可以把zsh设为默认的Shell,下面提供几个常用的命令,供大家参考:
1 | 查看系统安装的所有Shell |
2.4. SSH快速连接
主要有两种办法:
- sshpass
- expect
这里主要介绍expect方式。首先要确保expect已经安装,如果没有安装的话,可以通过brew install expect安装。之后创建一个sh脚本,输入:
1 | !/usr/bin/expect |
保存后记得给文件执行权限sudo chmod a+x xx.sh。其中:
1 | [lindex $argv 0]:端口号 |
打开iTerm2,打开Setting配置界面,Profiles -> General,左下角点击+号,新建profile,参考下面图片在对应位置输入内容即可。

Name:根据需求输入,通常选择标识性较强的内容便于区分,例如服务器的IP地址
Command:这里选择login Shell
Send text at start :
~/.XX.sh 22 xxx@xxx.xxx.xxx.xxx
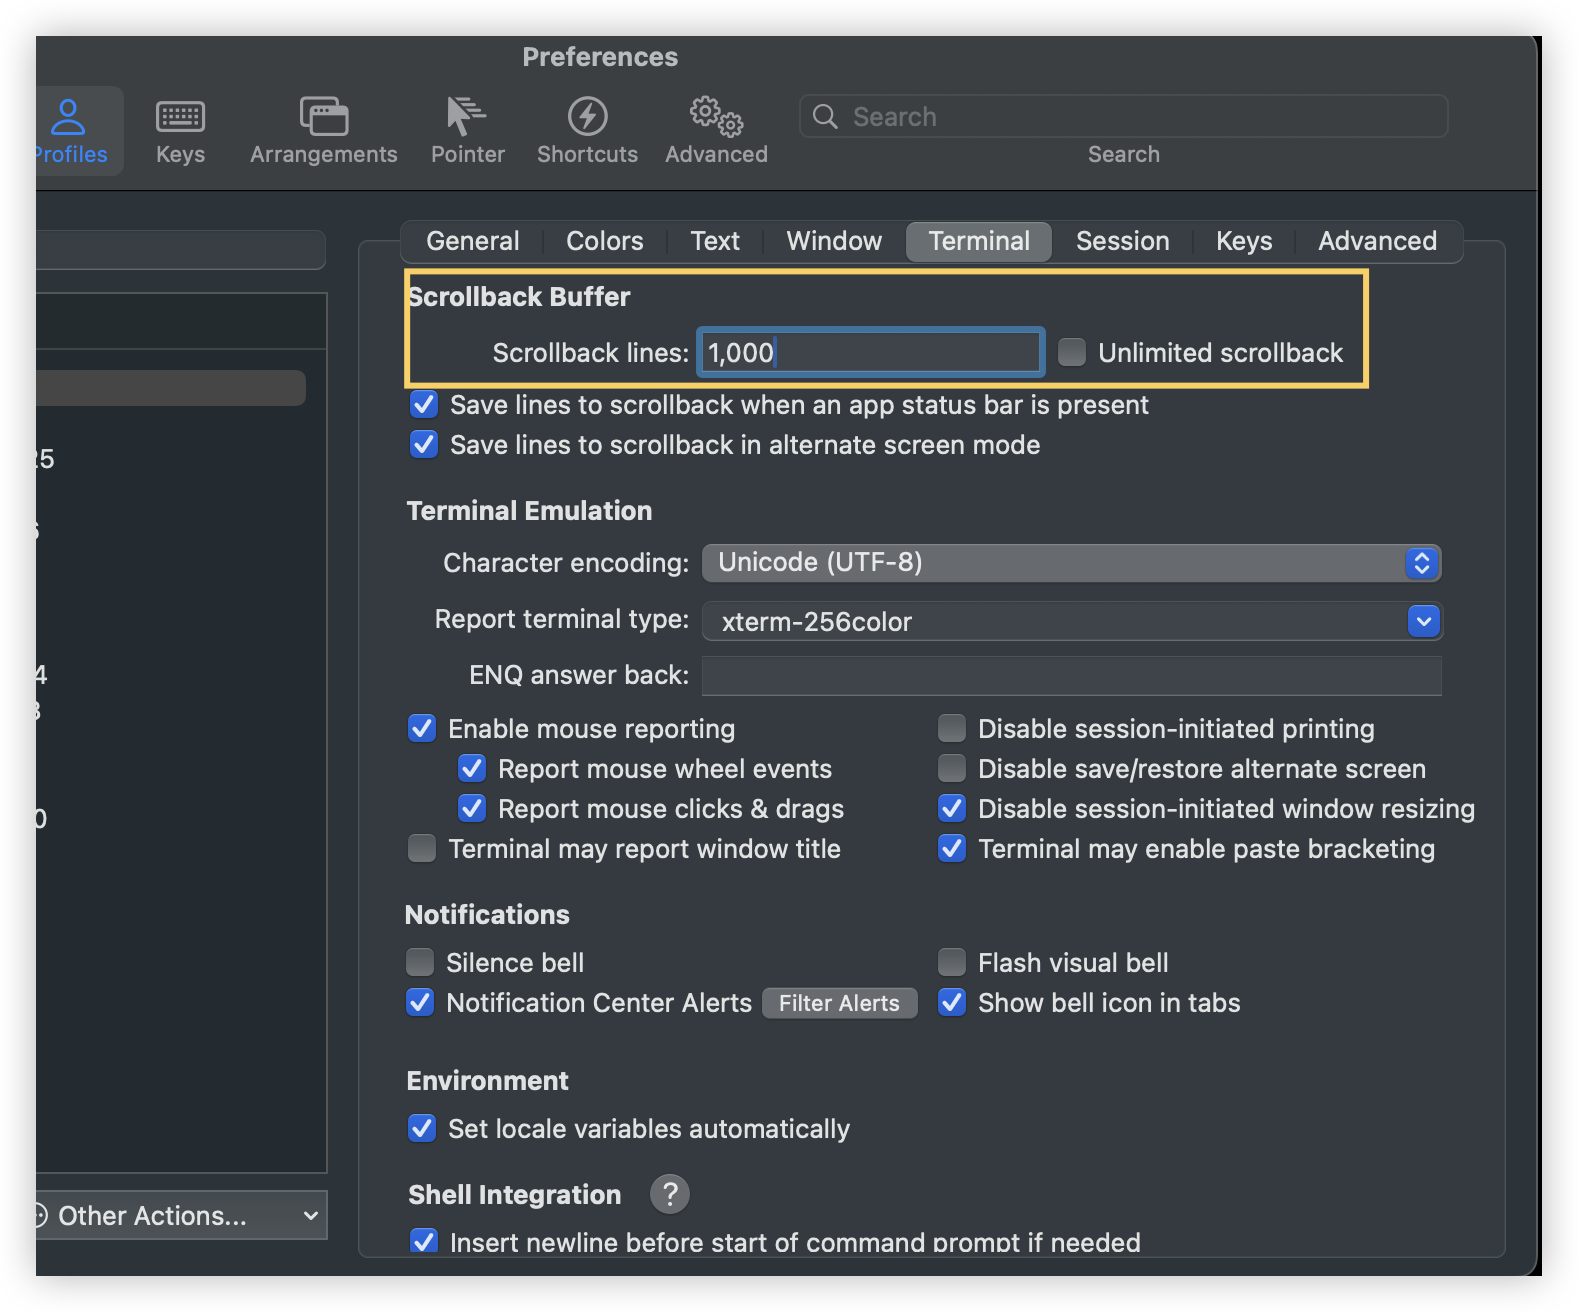
2.5. 设置终端历史行数
打开iTerm2,打开Setting配置界面,Profiles -> Terminal,根据需要进行修改,如果想不限制行数可以勾选Unlimited scrollback
3. iTerm2插件
3.1. 声明高亮zsh-syntax-highlighting
此款插件在我们使用命令行的时候如果遇到特殊命令或者错误命令,会有高亮显示,可以及时进行提醒。
1 | # 安装 |
3.2. 自动填充建议zsh-autosuggestions
这个插件也非常实用,可以方便我们快速的敲命令。
1 | # 克隆zsh-autosuggestions项目 |
3.3. 快速跳转插件autojump
此款插件可以帮助我们快速跳到常用的目录。
1 | # 安装 |
4. iTerm2快捷键
4.1. 标签
1 | # 新建标签:command + t |
4.2. 分屏
1 | # 垂直分屏:command + d 👍 |
4.3. 编辑
1 | # 清除当前行:ctrl + u |